// delay 1 - performSelector
[self performSelector:@selectors(changeName:) withObject:nil afterDelay:5.0];

// delay 2 - dispatch_after
dispatch_after(dispatch_time(DISPATCH_TIME_NOW, (int64_t)(3 * NSEC_PER_SEC)), dispatch_get_main_queue(), ^{
   lblName.text = @"dispatch_after 편하네";
});


# 공부를 위해 정리하는 글이므로, 정확하지 않을 수 있습니다. 지적은 언제나 감사합니다.


<연습문제>

다음과 같은 main.json 파일을 파싱해 테이블 뷰 custom cell에 띄우기

[{    "detail_hash": "HBDEF",    "image": "http://public.codesquad.kr/jk/storeapp/data/2d3f99a9a35601f4e98837bc4d39b2c8.jpg",    "alt": "[미노리키친] 규동 250g",
    "delivery_type": ["새벽배송", "전국택배"],
    "title": "[미노리키친] 규동 250g",
    "description": "일본인의 소울푸드! 한국인도 좋아하는 소고기덮밥",
    "n_price": "6,500",
    "s_price": "7,000원",
    "badge": ["이벤트특가"]
  },
  {
    "detail_hash": "HDF73",
    "image": "http://public.codesquad.kr/jk/storeapp/data/7674311a02ba7c88675f3186ddaeef9e.jpg",
    "alt": "[빅마마의밥친구] 아삭 고소한 연근고기조림 250g",
    "delivery_type": ["새벽배송", "전국택배"],
    "title": "[빅마마의밥친구] 아삭 고소한 연근고기조림 250g",
    "description": "편식하는 아이도 좋아하는 건강한 연근조림",
    "s_price": "5,500원"
  },
 
 ...


1. 파싱한 내용을 담을 객체 생성하기

  • 이때 객체 타입에 따라 편하게 담기 위해, 클래스에 Codable을 채택한다.

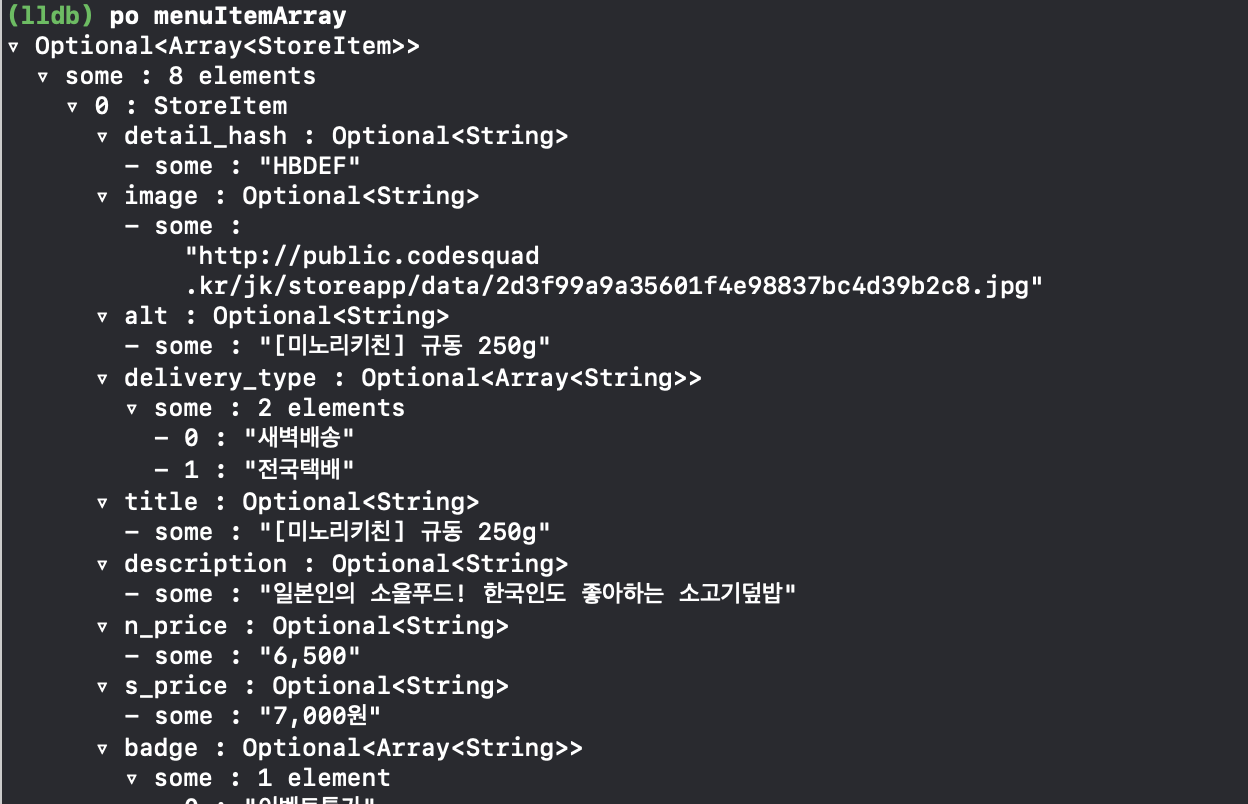
struct StoreItem : Decodable {
    var detail_hash : String?
    var image : String?
    var alt : String?
    var delivery_type : [String]?
    var title : String?
    var description : String?
    var n_price : String?
    var s_price : String?
    var badge : [String]?
}
  • json 파일에 특정 변수가 있는 경우, 없는 경우가 모두 있기 때문에 optional로 변수를 지정해주어야 한다.
    (옵셔널로 해주지 않으면 데이터가 제대로 들어가지 않음)

2. Json 파일을 파싱해 StoreItem 배열에 저장해준다.

  • 해당 path에서 json 파일을 string 으로 가져오고,

  • json String 을 data 타입으로 변경한 다음, JSONDecoder를 이용해 인스턴스에 저장한다.

    func loadData(){
        if let filePath = Bundle.main.path(forResource: "main", ofType: "json"){
            let decoder = JSONDecoder()
            let content = try! String(contentsOfFile: filePath)
            var data = content.data(using: .utf8)
            menuItemArray = try? decoder.decode(Array<StoreItem>.self, from: data!)
        }else {
            print("파일이 존재하지 않습니다.")
        }
    }


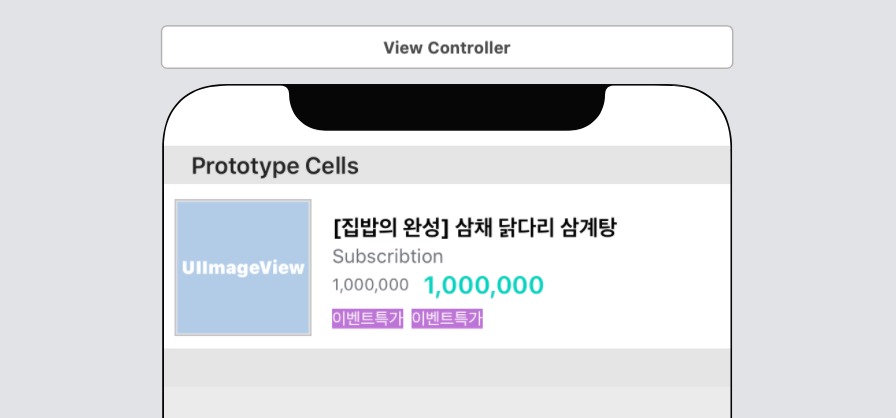
3. 원하는 디자인으로 커스텀 셀을 만들어준다.


4. 커스텀셀 파일을 생성하고, MainViewController의 테이블뷰 메서드에 파싱한 객체의 값을 넣어준다.

    func tableView(_ tableView: UITableView, cellForRowAt indexPath: IndexPath) -> UITableViewCell {
        let cell = tableView.dequeueReusableCell(withIdentifier: "MenuCell", for : indexPath) as! MenuItemCell
        
        cell.menuTitle.text = menuItemArray?[indexPath.row].title
        cell.menuSubscrib.text = menuItemArray?[indexPath.row].description
        cell.menuPrice_n.text = menuItemArray?[indexPath.row].n_price
        cell.menuPrice_s.text = menuItemArray?[indexPath.row].s_price

        return cell
    }


결과화면은 다음과 같다.


# 공부를 위해 정리하는 글이므로, 정확하지 않을 수 있습니다.

  • Codable이란?

    • A type that can convert itself into and out of an external representation."

      자신을 변환하거나 외부표현(external representation)으로 변환할 수 있는 타입

    • 즉, 특정 객체가 Codable 프로토콜을 채택하면, 해당 객체는 'json'과 같은 외부 타입으로 인코딩과 다시 json에서 객체로 디코딩이 가능하게 된다.

  • Codable 객체를 json으로 인코딩하기

    • 아래는 json으로 encoding한 예제이다. (Person객체 -> json)

      1. 인스턴스를 data 타입으로 인코딩

      2. data타입을 json 타입으로 변경

 func codableTest() {
        
        struct Person : Codable{
            var name : String?
            var age : Int
        }
        
        let encoder = JSONEncoder()
        let object = Person(name: "zeze", age: 7)
        let jsonData = try? encoder.encode(object)
        
        if let jsonData = jsonData, let jsonString = String(data: jsonData, encoding: .utf8){
            print(jsonString) //{"name":"Zedd","age":100}
        }

}


  •  
  • json을 인스턴스타입으로 파싱하기 ( jsonStr ➔ Data ➔ Object )

    • 받아온 json을 인스턴스로 파싱하는 것이 더 자주 사용되는 방식

    • 인코딩했던것과 반대방법으로

      1. json을 읽어 json String 값으로 저장

      2. json String 타입을 data타입으로 변경

      3. data타입인스턴스로 디코딩

func codableDecoding(jsonStr : String){

  	let decoder = JSONDecoder()
    var data = jsonStr.data(using: .utf8) // json형식을 Data타입으로 변경
    // data타입을 인스턴스 타입으로 변경
    if let data = data, let myPerson = try? decoder.decode(Person.self, from: data){
    	print(myPerson.name) //Zedd
      print(myPerson.age)
    }
}
  •  


※ json 파일을 json string으로 읽어오기

  1. 파일 경로 가져오기

  2. 파일경로로 json String 가져오기

let filePath = Bundle.main.path(forResource: "animals", ofType: "json")
let content = try! String(contentsOfFile: filePath!)


menuItemArray 에 데이터가 들어간 모습


+ Recent posts